
Table of Contents
- What Drives Your Backyard Renovation Cost
- Backyard Renovation Cost by Project Type
- Your Backyard Project Planning Checklist
- Backyard Renovation Timeline: From Design to Done
- Backyard Design Ideas That Fit Your Budget
- How to Save on Your Backyard Transformation
- Conclusion
- Frequently Asked Questions
Last Updated: October 6, 2026
What Drives Your Backyard Renovation Cost
Backyard renovation cost is the total you'll spend turning raw outdoor space into a finished living area, and it's decided before a single shovel hits the ground.
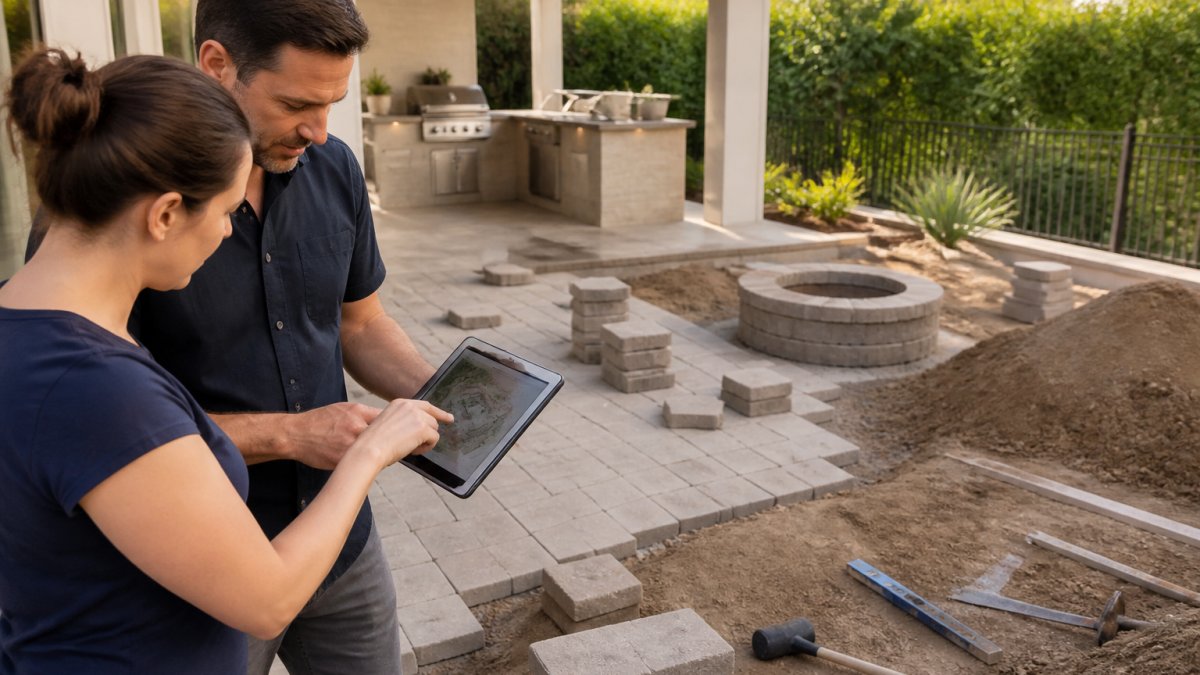
Three things move your number the most:
- Project scope. A patio refresh and a full outdoor kitchen are different projects with different budgets.
- Site conditions. Slopes, poor drainage, and old concrete removal add work before anything new goes in.
- Material choices. Pavers, tile, and finishes vary widely in cost and lifespan.
Here's the part most guides skip: the design phase is where you control cost. Once you've seen a realistic rendering, you can cut or swap elements before they're built, not after.
Hardscaping vs. Softscaping: Where the Money Goes
Hardscaping covers built elements: patios, retaining walls, walkways, and outdoor kitchens. Softscaping covers living elements: sod, planting beds, trees, and irrigation. Hardscaping usually takes the larger share because it involves excavation, site prep, grading, and skilled installation.
Softscaping costs less per square foot, but it's not free. A common mistake is underfunding the unglamorous work: drainage and base prep protect everything above them. Skip them and you'll pay twice.
Backyard Renovation Cost by Project Type
Cost depends far more on what you build than on how big your yard is. A small yard with an outdoor kitchen can cost more than a large yard with a simple patio. Compare projects on three things: materials versus labor share, site work triggered, and whether utility rough-in is needed.
Here's how the main project types compare.
| Project Type | Typical Cost Drivers | Material vs. Labor Split | Utility Work | Relative Cost Tier |
|---|---|---|---|---|
| Patio or hardscape refresh | Pavers or stone, base prep, grading, drainage | Materials-heavy; labor concentrated in prep | None | Entry |
| Fire feature | Fire pit or fire table, burner, surround, gas line | Balanced; the feature itself is the material cost | Gas line, sometimes electrical for ignition | Entry to mid |
| Outdoor kitchen | Cabinetry, countertop, grill, storage, ventilation | Materials-heavy; labor concentrated in framing and utility rough-in | Gas, electrical, sometimes water and drain | Mid to high |
| Pool equipment upgrade | Pump, filter, heater or heat pump, automation, cleaner | Materials-heavy; labor is short but specialized | Electrical, sometimes gas | Mid |
| Full outdoor living build | Kitchen, fire, lighting, shade, hardscape, softscape | Balanced across many trades | Gas, electrical, sometimes water | High |
A few patterns hold across every project type:

- Site work is the great equalizer. Two identical patios can differ substantially if one sits on a flat, drained yard and the other needs excavation, retaining, or regrading.
- Utility rough-in is where budgets surprise people. A gas line or dedicated circuit is a small line item on paper and a large one once trenching, permits, and inspections are involved.
- Materials set the ceiling, labor sets the floor. You can trade down on finishes, not on the labor to prepare a base, set a footing, or pull a permit.
Fire Features, Kitchens, and Water Elements
Fire features are the fastest way to extend how late you use your yard, from a simple fire pit to a built-in fire table with a gas line and electronic ignition.
Outdoor kitchens cost more because they combine cabinetry, countertops, a grill, and utility hookups for gas and power. Ventilation, storage drawers, and refrigeration each add complexity.
Water elements, from fountains to full pool systems, sit at the top of the range once you factor in equipment and automation.
At Bellafina Outdoors, we help clients compare these options side by side in our Huntington Beach showroom so they can see finishes and scale in person before committing. One of our most popular fire features is the Angelus Fire Pit, made from glass-fiber reinforced concrete with a stainless steel burner and your choice of match-lit or electronic ignition.
Cost of Ownership: What Each Feature Costs After Installation
Most cost guides stop at installation. That's a mistake: the features with the highest install cost aren't always the ones with the highest ongoing cost, and vice versa.
- Pools and spas. Pumps, filters, heaters, and sanitization consume energy and consumables. A variable-speed pump and modern automation can meaningfully reduce operating cost versus older single-speed equipment, which is why upgrades often pay back over time.
- Lawns. Sod is inexpensive to install and expensive to keep. Water, mowing, fertilization, and periodic renovation add up, and in coastal Southern California the water bill moves most.
- Low-water plantings. Higher upfront cost for the right palette and drip irrigation, lower ongoing cost once established, the clearest example of a feature that costs more on day one and less every year after.
- Outdoor kitchens. Grills need cleaning and occasional part replacement. Gas appliances, refrigerators, and ventilation have service lives, and countertops and cabinetry vary in how they weather coastal sun and salt air.
- Fire features. Gas consumption is modest, but burners, ignition systems, and surrounds need periodic inspection. Electronic ignition adds convenience and one more component to maintain.
- Lighting. LED fixtures have long service lives, but transformers and connections fail first, and they're the parts most homeowners forget to budget for.
A practical rule: for any feature, ask what it costs to install, run for a year, and service over ten years. The feature that wins on install cost often loses on total cost of ownership.
Your Backyard Project Planning Checklist
A backyard project planning checklist keeps a renovation on budget and on schedule. Work through it in order to catch expensive surprises early.
- Define how you want to use the space (dining, lounging, cooking, swimming)
- Set a total budget and a contingency for surprises
- Measure your usable square footage
- Check for slopes, drainage issues, and utility lines
- Confirm local permit requirements before design
- Collect design ideas and reference images
- Get a realistic rendering of the finished space
- Select hardscape materials, tile, and finishes
- Choose fire, kitchen, and lighting products
- Line up licensed trades for gas, electrical, and plumbing
- Sequence the work so trades don't block each other
- Plan for maintenance costs after completion
Backyard Renovation Timeline: From Design to Done
A backyard renovation timeline typically runs from a few weeks for a simple patio to several months for a full outdoor living build. Design and permitting take the longest; construction moves faster once materials are on site.
Here's how the phases stack up:
- Design and visualization. You define the layout and see renderings. This is where revisions are cheap.
- Permitting. Required for many structural, electrical, and gas elements. Timelines vary by project and jurisdiction.
- Site preparation. Excavation, grading and leveling, and utility rough-in.
- Hardscape installation. Patios, walls, and footings.
- Softscape and finishes. Sod, planting beds, tile, and lighting.
- Final connections. Gas, electrical, and equipment commissioning.
The biggest delay we see is homeowners finalizing products late. Lock your materials during design, not during construction.
Backyard Design Ideas That Fit Your Budget
Good design ideas scale to your budget instead of fighting it. Spend where you'll feel it daily and save where you won't.
- Start with one anchor feature. A fire table or outdoor kitchen becomes the focal point. Build around it.
- Use phased renovation. Build the patio and utilities first, then add the kitchen or fire feature later.
- Choose durable hardscape materials. Quality pavers and stone cost more upfront and less over time.
- Add lighting in layers. Path, accent, and task lighting change how the space feels after dark.
- Plan for shade and climate control. Shade structures and heating extend usable months.
- Keep planting simple. A clean palette of low-water plants costs less to maintain.
If you're weighing a phased approach, our team can map which elements to build now and which to stage later, so the first phase doesn't block the second.
How to Save on Your Backyard Transformation
You save most on a backyard transformation by making decisions before construction, not by cutting quality. Material markup and labor rates are hard to change once work starts. Design choices are not.
Where the real savings live:
- Finalize products during design. Late changes trigger rework and change orders.
- Bundle trades. Fewer mobilizations means lower labor costs.
- Phase the build. Spread cost across seasons without losing the overall plan.
- Choose low-maintenance materials. They reduce long-term upkeep.
- Skip the impulse upgrades. Add features only if you'll use them.
Phased Renovation: Breaking a Large Project Into Manageable Stages
Most cost guides treat a backyard project as a single decision.
The key is sequencing. Some elements have to come first because everything else depends on them.
Phase 1: Foundation. Site work, grading, drainage, and the primary hardscape footprint.
Phase 2: Utilities and structure. Gas lines, electrical runs, and footings for shade, kitchens, or fire features.
Phase 4: Finishes and softscape. Tile, lighting, planting, and the details that make the space feel finished.
A few practical rules for phasing:
- Never phase the drainage. It's the cheapest thing to do once and the most expensive thing to do twice.
- Always stub utilities ahead of schedule. The cost of a capped gas line during Phase 1 is trivial compared to the cost of trenching a finished patio in Phase 3.
- Keep the design unified. A phased project should still follow one master plan. Piecemeal additions that ignore the original layout end up looking like additions.
- Match materials across phases. Dye lots, stone batches, and paver runs change over time. Buying the full material quantity upfront and storing it is often cheaper than matching it later.
Conclusion
The hard part of a backyard renovation isn't picking a number. It's keeping the finished space aligned with what you pictured and what you budgeted. Bellafina Outdoors helps you get there with design and visualization services, a curated showroom of premium fire features, outdoor kitchens, and architectural finishes, and dedicated support for contractors and designers. Visit our Huntington Beach design center to see products in person and request a design consultation before you break ground.
Frequently Asked Questions
How much does it cost to transform a backyard?
Backyard renovation cost varies widely based on scope, materials, and labor. The best way to get an accurate number is to define your project scope and request a detailed estimate.
What factors affect the cost of a backyard makeover?
Key factors include square footage, hardscape materials (pavers, stone, concrete), softscape elements (sod, plants, irrigation), labor rates, permit fees, and site preparation like grading and drainage. Outdoor kitchens, fire pits, and lighting add significant cost. Your backyard renovation timeline also affects pricing; rushed projects may incur overtime.
How long does a backyard renovation take?
A typical backyard renovation timeline runs 4 to 12 weeks from design approval to completion, depending on scope. Design and permitting can take 2-4 weeks, while construction of hardscaping, outdoor kitchen, and fire features may take 6-10 weeks. Weather, material lead times, and contractor availability can extend the schedule. Phased projects spread over several months can reduce disruption but require careful planning.
Is it worth hiring a landscape designer for a backyard project?
Hiring a landscape designer or using a design center's visualization services can save money by preventing costly mistakes and ensuring your project fits your space and budget. Designers help with material selection, layout, and permit requirements. For complex projects with outdoor kitchens, fire features, and drainage solutions, professional design typically pays for itself through better planning and fewer change orders during construction.