
Table of Contents
- Why Visualizing Your Backyard Renovation Matters
- Measure Your Space Accurately
- 2D vs 3D Design Methods: Which Approach Works Best
- Create a Backyard Renovation Planning Checklist
- Integrating Hardscaping and Softscaping in Your Vision
- When to Consider Hiring a Landscape Designer
- Common Visualization Mistakes to Avoid
- Bringing Your Visualization to Reality
Last Updated: August 30, 2026
Why Visualizing Your Backyard Renovation Matters
Before you break ground on a backyard renovation, you need to see it first. Visualization creates a clear picture of your finished space before construction begins, so you can make confident decisions about design, materials, and layout.
Most homeowners skip this step and hope everything works together once construction starts. Then the patio goes in, the fire feature arrives, and suddenly they're rethinking the whole design because nothing flows the way they imagined. By then, changes cost time and money.
When you can see your backyard renovation in realistic 3D renderings or overlay it onto your actual yard using augmented reality, you catch design problems before they become construction problems. You confirm that the outdoor kitchen fits the space, verify that the fire feature doesn't block sightlines, and test material combinations to see how light hits your finishes.
At BellaFina Outdoors, we've worked with homeowners, contractors, and designers planning outdoor spaces in Orange County and Southern California. Investing time in visualization can lead to higher satisfaction with finished projects, fewer change orders, and outdoor spaces that are used as imagined.
Measure Your Space Accurately
Accurate measurements are the foundation of any visualization. Without them, your 3D model won't match reality.
Start by measuring your backyard's footprint with a 100-foot tape measure or measuring wheel. Mark the perimeter, then measure key features: existing structures, trees, utility boxes, and grade changes. Note the location of water lines, gas lines, electrical panels, and any underground utilities. Contact your local utility locating service before digging if you're unsure where utilities run (call811.com).
Take photos from multiple angles and heights, ground level to understand sightlines, and elevated positions to see overall layout. Capture morning, afternoon, and evening light, as this matters enormously for understanding how shadows fall across your space.
Sketch a rough site plan on graph paper or in a basic digital tool. Include north orientation; knowing which direction your yard faces changes everything about sun exposure, wind patterns, and usability at different times of day.
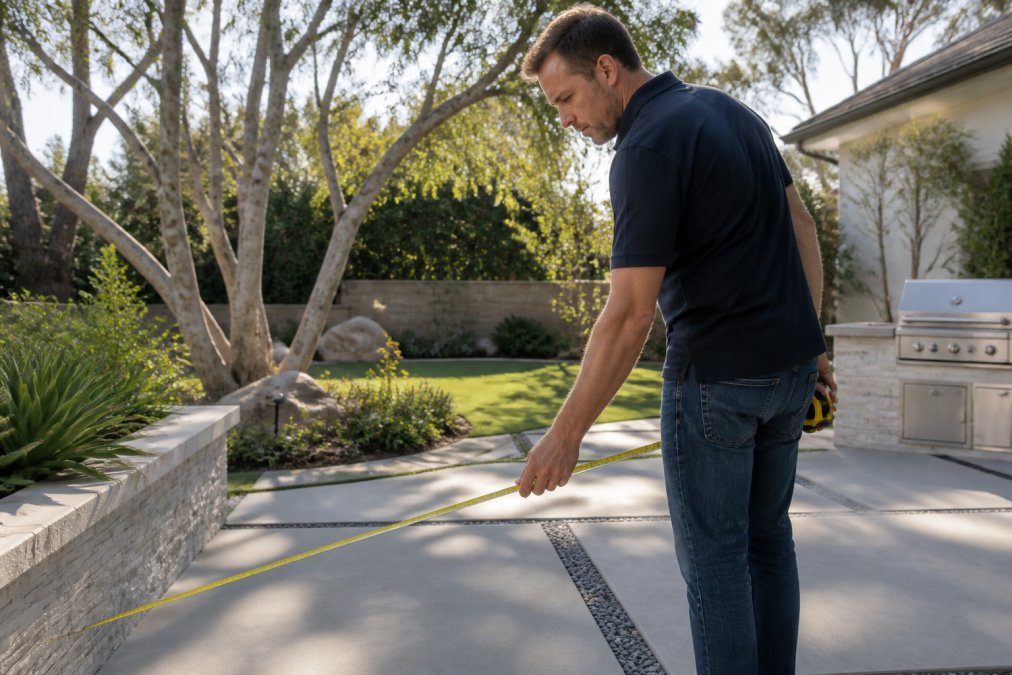
Measure elevation changes. If your yard slopes, that affects drainage, seating comfort, and material performance. A simple way to check grade is to place a long straight board across the slope and measure the height difference at each end (extension.oregonstate.edu).
For projects involving a pool, outdoor kitchen, or fire feature, note the exact location of existing utilities. Gas lines, electrical conduits, and water connections determine where you can safely place new features. Once you have measurements and photos, you're ready to move into visualization methods.
2D vs 3D Design Methods: Which Approach Works Best
The method you choose depends on your project complexity, timeline, and budget.
2D Site Plans and Blueprints
A 2D site plan is a top-down view of your backyard showing layout, dimensions, and placement of features. It's the foundation of any design and the easiest format for contractors to understand and quote from.
2D plans work well for straightforward layouts: a patio, planting bed, or fire feature in a defined location. They're fast to create, easy to modify, and they force you to think clearly about spatial relationships. Contractors use 2D plans to calculate material quantities, understand drainage flow, and identify conflicts with utilities.
The limitation is obvious: a 2D plan doesn't show you what your space actually looks like. You can't see how tall the outdoor kitchen will feel relative to your seating area or whether the fire feature dominates the view from your back door. For complex renovations involving multiple features, 2D leaves too much to imagination.
3D Rendering and Photo-Realistic Visualization
3D rendering shows your space from a perspective view, with depth, lighting, materials, and realistic proportions. Photo-realistic renderings overlay your design onto photographs of your actual yard, so you see your backyard renovation exactly as it will appear.
A photo-realistic rendering shows you how the outdoor kitchen looks in context with your house and landscape, whether the fire feature feels proportionate, how stone finishes and plantings work together, and sightlines from your main living areas.
Many landscape architects and designers in Southern California now include renderings as part of their design process. Some design centers, like BellaFina Outdoors, offer outdoor living design and visualization services to help clients visualize projects before committing to final specifications.
Augmented Reality and Virtual Walkthroughs
Augmented Reality (AR) technology overlays digital designs onto your real backyard using a smartphone or tablet. You point your device at your yard and see the proposed outdoor kitchen, fire feature, or patio in real-time, scaled to your actual space.
Virtual Reality (VR) walkthroughs place you inside a fully immersive 3D environment, experiencing the space at human scale. This is particularly useful for understanding how a large structure, like a covered pavilion or outdoor kitchen, will feel in your actual space.
Create a Backyard Renovation Planning Checklist
A planning checklist keeps you organized and ensures you don't overlook critical decisions before visualizing backyard renovations.
| Planning Stage | Key Decisions | Timeline |
|---|---|---|
| Define Scope | What features? Budget range? Timeline? | Week 1 |
| Measure & Document | Site measurements, photos, utility locations | Week 2 |
| Gather Inspiration | Design references, material samples, product research | Week 2-3 |
| Create Site Plan | 2D layout with dimensions and placement | Week 3-4 |
| Select Materials & Products | Finishes, plants, equipment, features | Week 4-5 |
| Develop Renderings | Professional visualization or digital mockups | Week 5-8 |
| Review & Refine | Design feedback, revisions, final sign-off | Week 8-10 |
| Prepare for Construction | Permits, contractor quotes, final specifications | Week 10-12 |
Start by defining scope. What are you actually renovating? A patio expansion or a complete backyard redesign with outdoor kitchen, fire feature, and landscape? The scope determines the complexity of visualization and the tools you'll need.
Set a realistic budget and establish a timeline. How soon do you want construction to start? Professional renderings can take several weeks.
Gather inspiration before you visualize. Collect images of outdoor spaces you love and note specific elements: the style of the fire feature, the color of the stone, the arrangement of the seating area.
Research products early. If you're planning an outdoor kitchen, look at actual equipment dimensions and finishes. If you're adding a fire feature, understand the space requirements and visual impact of different styles. BellaFina Outdoors carries premium fire features and fire pits, and seeing these products in person at our Huntington Beach design center helps you visualize how they'll look in your space. Consider the Gallaway Corten Steel Fire Pit for a unique, weathering steel aesthetic, priced at $5,894.00, or the elegant Angelus Fire Pit at $7,684.00, made from glass-fiber reinforced concrete. For a versatile option, the Balboa Fire Table is available for $6,148.00, offering eighteen color choices, and the Luna Fire and Water Bowl at $2,819.00 provides a striking centerpiece.

Create your 2D site plan before investing in renderings. This confirms that your layout makes sense and that contractors can understand what you're asking for.
Once your layout is solid, select materials and finishes. Photo-realistic renderings show material colors, textures, and how they interact with light and landscape.
Finally, prepare for construction. Finalize permits, get contractor quotes based on your rendering and specifications, and confirm all details before breaking ground.
Integrating Hardscaping and Softscaping in Your Vision
Hardscaping (patios, walkways, retaining walls, fire features, outdoor kitchens) and softscaping (plants, trees, lawn) must work together visually and functionally. Many homeowners design hardscape first and add plants as an afterthought.
When visualizing backyard renovations, think about hardscape and softscape as a unified system. The fire feature should be framed by plantings that create enclosure. The outdoor kitchen should have shade from trees or a structure. The patio should transition smoothly to planting beds that soften its edges.
Start with the hardscape layout and confirm that traffic flow works. Then layer in softscaping. Where does shade come from? How do you create privacy or visual interest? What's the plant palette?
Request a Design Consultation →
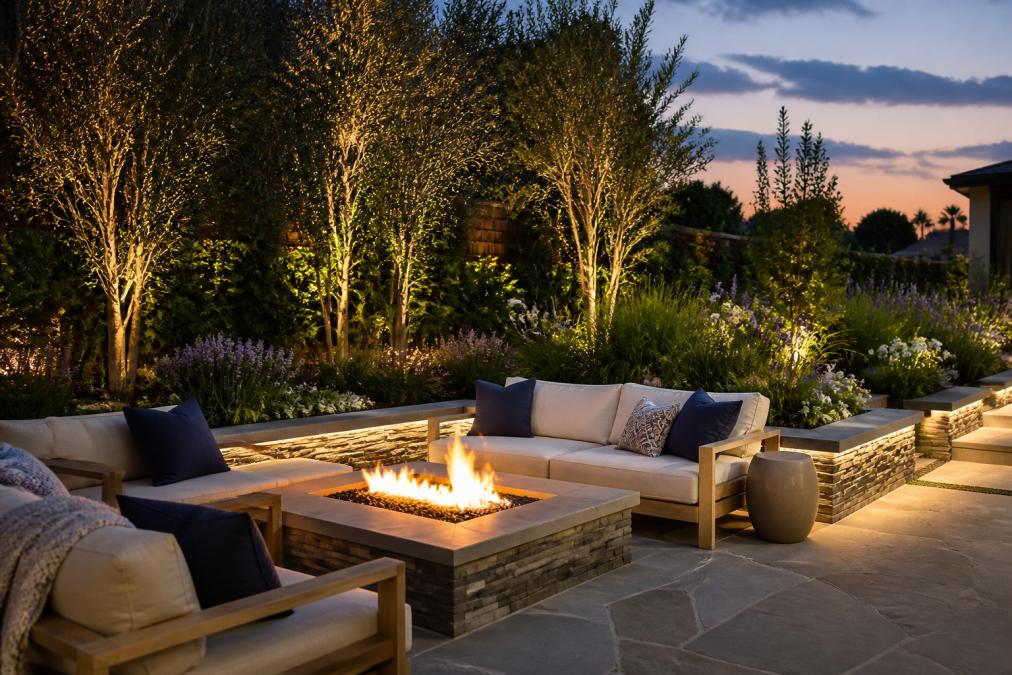
In photo-realistic renderings, you can see how plantings frame your hardscape features and test different plant sizes and densities. You can verify that mature trees won't eventually shade out your outdoor kitchen or block views you want to preserve.
Consider seasonal changes. A rendering typically shows your space at one moment in time. Deciduous trees lose leaves in winter, opening up views and reducing shade (extension.oregonstate.edu). Understanding these seasonal shifts helps you design a space that works year-round.
Material integration matters too. The stone color of your patio should complement your house, landscape, and fire feature. In visualization, you can test combinations before ordering materials.
When to Consider Hiring a Landscape Designer
Some homeowners visualize backyard renovations entirely on their own. Others work with a designer. Neither approach is wrong; it depends on your project complexity, your comfort with design, and your budget.
Hire a landscape designer if your project is complex with multiple features or significant elevation changes, you want professional renderings to guide your contractor and confirm your vision, you're uncertain about spatial relationships or material choices, or you're investing significantly in hardscape and want to avoid costly mistakes.
Work on your own if your project is straightforward, you're comfortable using design software or working with 2D plans, you have time to learn the process, or you're working with a contractor experienced enough to guide design decisions.
Many homeowners use a hybrid approach: they do initial planning themselves, then bring in a designer for renderings and refinement.
If you do hire a designer, look for someone who can deliver photo-realistic renderings. A designer who can show you exactly what your space will look like is valuable. In Southern California, many landscape architects and design professionals work with clients to develop comprehensive visualizations before construction.
BellaFina Outdoors offers design and visualization services to help clients see their outdoor projects before committing to final specifications. Whether you're working with your own designer or exploring options independently, having access to professional visualization tools and expert guidance can improve project outcomes.
Common Visualization Mistakes to Avoid
Understanding common pitfalls helps you avoid them.
Skipping the site measurement step. Designers and contractors need accurate dimensions. Rough estimates lead to renderings that don't match reality.
Confusing inspiration with design. A beautiful outdoor kitchen online might be sized for a much larger yard or designed for a different climate. Inspiration is valuable, but it needs to be adapted to your specific site.
Underestimating how features will feel at full scale. A fire feature that looks perfect in a rendering might feel oversized in your actual space. Ask your designer to provide views from multiple distances and angles.
Ignoring seasonal light and shadow. A rendering shows your space at one moment on one day. A patio that gets afternoon sun in summer might be shaded in winter.
Choosing materials based on renderings alone. Photos and renderings compress color and texture. Before finalizing material choices, see samples in your actual yard, in your actual light. BellaFina Outdoors has physical samples of premium finishes and fire features you can view and touch before making decisions.
Not planning for maintenance and long-term performance. Discuss with your designer or contractor how plantings will grow in and how materials will weather over time.
Bringing Your Visualization to Reality
The moment between "I love this rendering" and "construction starts" is critical.
First, confirm that your rendering matches your site plan and specifications. The rendering should be based on accurate measurements and a detailed 2D layout.
Second, finalize all material selections. Your rendering shows colors and finishes, but you need to order specific products with exact specifications.
Third, get detailed quotes from contractors. Your rendering and site plan should be specific enough that contractors understand exactly what you're asking for.
Fourth, address permits and approvals. Check with your local building department early; don't wait until you're ready to start construction.
Fifth, establish a change-order process. During construction, you'll likely want to adjust something. Having a clear process for approving changes and understanding their cost impact prevents chaos.
Finally, maintain communication with your contractor. Your rendering is a reference tool throughout construction. If the contractor is uncertain about a detail, refer back to the rendering and your specifications.
The goal of visualization is confidence. When you move from rendering to construction, you should know exactly what you're building, why you're building it that way, and what the finished space will look like. That clarity prevents expensive mistakes and ensures your backyard renovation delivers the outdoor living space you envisioned.
Bringing your backyard renovation vision to life requires more than inspiration, it requires a clear plan, accurate visualization, and expert guidance. At BellaFina Outdoors, we help homeowners and contractors in Orange County and Southern California visualize outdoor projects before construction begins, using professional renderings and design consultation to ensure every detail is right. Whether you're planning an outdoor kitchen, fire feature, or complete backyard redesign, our team can help you see your space clearly and make confident decisions. Request a design consultation to explore how professional visualization can transform your project planning process.
Frequently Asked Questions
Q: What's the best way to visualize backyard renovations if I'm not tech-savvy?
A: Start simple: measure your space, sketch it on paper, and use printed photos of designs you like as mood boards. Many professionals offer 2D site plans that are easier to read than 3D models. If you want more detail, apps like Canva or Pinterest let you create collages without technical skills. For a polished visualization, hiring a landscape designer who creates renderings removes the learning curve entirely, they translate your ideas into professional 3D models you can review and refine.
Q: How accurate are 3D landscape design software renderings compared to what actually gets built?
A: Professional 3D renderings are highly accurate when based on precise site measurements and real product specifications. Photo-realistic rendering captures lighting, material finishes, and spatial relationships well. However, renderings don't account for factors like seasonal plant growth, soil conditions, or subtle elevation changes that emerge during construction. The best approach: use renderings to validate your design choices, then work with your contractor to confirm that materials, hardscaping placement, and utilities match the plan during installation.
Q: What should I include in a backyard renovation planning checklist?
A: Start with the basics: yard dimensions, sun exposure patterns, existing utilities (gas, electric, water lines), drainage patterns, and budget. Then list your must-haves: outdoor kitchen, fire feature, patio material, shade structures, lighting, and plant types. Include contractor coordination tasks like permits, timeline, and access routes. Finally, note design preferences: style (modern, rustic, Mediterranean), color palette, and how you'll use the space (entertaining, family time, quiet retreat). A complete checklist prevents costly surprises and keeps your project on track.
Q: Is it worth hiring a landscape designer just for visualization, or should I try DIY tools first?
A: DIY tools work well if you have a clear vision and a straightforward space. They're fast and cost-effective for simple layouts. However, professional designers add value beyond visuals: they identify problems you'd miss (poor drainage, sun angles, scale issues), source premium materials, and create construction documentation that contractors follow precisely. For complex projects, especially those involving multiple hardscaping elements, outdoor kitchens, or fire features, a designer's expertise can save money by preventing costly mistakes and ensuring everything functions correctly.
This article was written using GrandRanker