
Table of Contents
- Start With a Realistic Budget and Layout Goals
- Choosing the Right Location for Your Outdoor Kitchen Layout
- Outdoor Kitchen Ergonomics and Workflow: The Work Triangle
- Outdoor Kitchen Utility Planning Checklist: Gas, Water, Power
- Durable Materials for Coastal Outdoor Kitchens
- Outdoor Kitchen Appliance Selection 2026
- Permits, Zoning, and Safety Compliance
- Conclusion
- Frequently Asked Questions
Last Updated: September 16, 2026
Start With a Realistic Budget and Layout Goals
A successful outdoor kitchen layout starts with two decisions made before any product is chosen: how the space will be used and what the project can realistically absorb. At Bellafina Outdoors, we've observed that homeowners who define cooking style, guest count, and budget range first tend to achieve a layout that serves them well long-term. Those who shop for grills first often find themselves needing to re-evaluate their setup sooner.
Work through these questions before you sketch anything:
- Will you grill weeknights for two, or host 20 people on weekends?
- Do you want a single cook station or a full prep, cook, and serve sequence?
- Is this a phased project, or one build?
- How much covered space do you actually have?
Choosing the Right Location for Your Outdoor Kitchen Layout
Location decides more about your outdoor kitchen layout than any appliance choice. Sun exposure, wind, door traffic, and distance from the house all shape how often you actually use the space.
Outdoor Kitchen Ergonomics and Workflow: The Work Triangle
The work triangle is the single most useful planning concept in outdoor kitchen design. It places the grill, the prep sink, and the refrigerator within a few steps of each other so cooking stays efficient instead of turning into laps around the island.
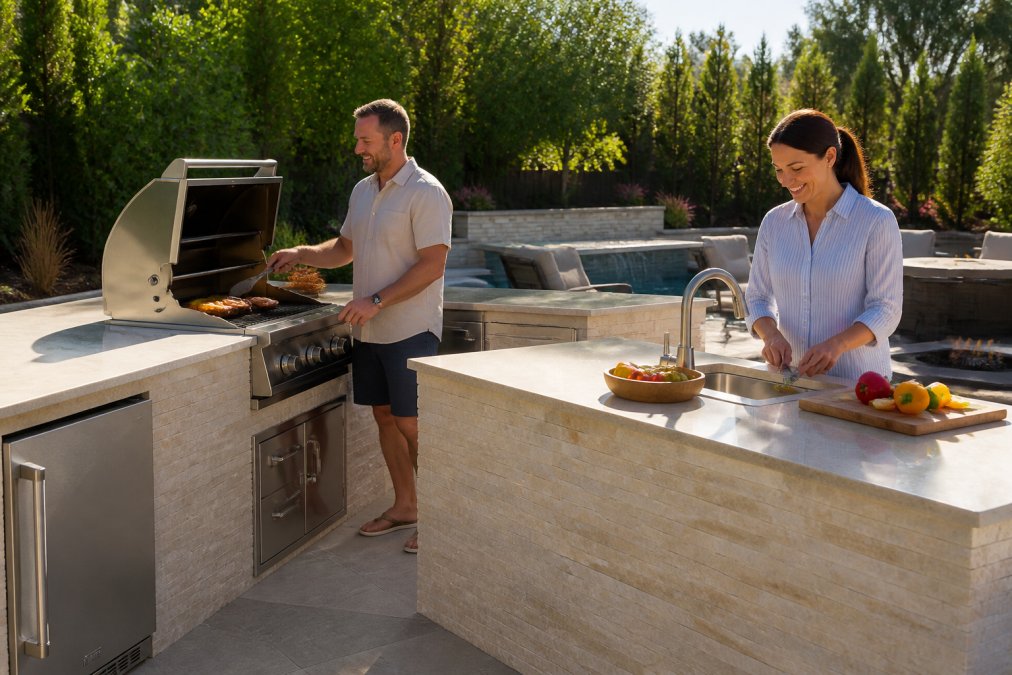
Two more ergonomic rules that most guides skip:
- Counter height should suit the primary cook, not a standard number pulled from a catalog.
- Leave at least 36 inches of clear walkway behind seating so people can pass a working cook.
Outdoor Kitchen Utility Planning Checklist: Gas, Water, Power
The outdoor kitchen utility planning checklist is where good layouts survive or fail. Run this list before you finalize any drawing:
- Confirm gas type: natural gas line or liquid propane
- Size the gas line for every burner running at once
- Locate water supply and drain for the prep sink
- Calculate electrical load for refrigeration, lighting, and audio
- Add GFCI protection for all outdoor outlets
- Plan conduit for future smart controls
- Mark shutoff valve locations for gas and water
Durable Materials for Coastal Outdoor Kitchens
Coastal air is hard on outdoor kitchens. Salt, moisture, and temperature swings punish materials that perform fine inland, which is why material selection in Huntington Beach and Newport Beach deserves more scrutiny than a generic spec sheet suggests.
Outdoor Kitchen Appliance Selection 2026
Appliance selection in 2026 is less about which grill looks best and more about how the equipment talks to the rest of the outdoor space. The shift is toward integrated, connected systems specified at the utility stage rather than retrofitted after the countertops are set.
What "Smart" Actually Means in an Outdoor Kitchen
Smart outdoor appliances fall into four practical categories, and each one has a different utility requirement:
- Connected grills, temperature probes and app monitoring that let you track cook progress from inside the house. Most need a dedicated outlet near the grill, not just a gas line.
- App-controlled lighting, low-voltage LED systems with zone control. These need a transformer sized for the full run and a switched circuit you can reach without walking the perimeter.
- Automated irrigation and misting, useful in Southern California summers, but they need a water line and a controller that can be isolated from the kitchen's potable supply.
- Smart refrigeration, temperature alerts and energy monitoring. The value here is less novelty and more knowing your fridge did not fail before a weekend party.
Matching Burners and BTU to How You Cook
Burner count is the most overbought spec in outdoor kitchens. A five-burner grill is the right call for someone who regularly cooks for a crowd and wants a sear zone plus a low-and-slow zone running at the same time. For weeknight cooking for two, a well-built three- or four-burner unit with a reliable ignition and even heat distribution will outperform a larger grill that never gets used to capacity.
A few selection principles that hold regardless of brand:
112" Maestro - L - B - Complete BBQ →
- Match burner count to real cooking patterns, not to the largest model on the floor.
- Specify built-in appliances so the layout stays clean and the equipment stays weather-protected under a cover or hood.
- Size refrigeration for how you actually entertain, a 4.5 cu. ft. unit covers most households; larger only if you host often.
- Plan clearance and ventilation around every heat source at the design stage, not after the island is framed.
- Confirm the fuel source early. Natural gas and liquid propane require different orifices and different line sizing, and switching later is expensive.
Ventilation, Clearance, and the Details That Age Well
Ventilation is the spec most homeowners skip and most inspectors check. A grill under a solid cover needs a hood or an engineered opening; a pergola with open slats usually qualifies as ventilated on its own. Clearance to combustibles is set by the manufacturer and drives your back-wall material and countertop depth, pull the spec sheet before you finalize the drawing.
A 2026 Selection Shortlist
Before you commit to any appliance, answer these five questions:
- What fuel source is available, and is the line sized for every burner at once?
- How many people do you cook for on a typical weekend, not a holiday?
- Which appliances genuinely benefit from connectivity in your household?
- What is the ventilation and clearance plan for each heat source?
- Which items are worth specifying now versus phasing in later?
Permits, Zoning, and Safety Compliance
Here is how the layers typically stack up in coastal Orange County:
- City building department, issues permits for gas piping, electrical circuits, and any structural work such as a pergola footing or a masonry island. Most cities require a permit when you extend a gas line, add a dedicated circuit, or build a structure over a certain height.
- County or regional authority, may have jurisdiction over air quality rules that affect which grills and fire features are allowed, especially wood-burning units. Always confirm before specifying a wood-fired oven or fire pit.
- HOA, governs height, materials, color, placement, and sometimes even the type of grill. HOA approval often takes longer than the city permit, so start it first.
The Permit Sequence That Actually Works
- Check HOA CC&Rs before you draw anything. Architectural review can take weeks and can reject a layout you have already priced.
- Confirm what needs a permit with the city. Gas and electrical almost always do. Freestanding, non-plumbed islands sometimes do not, but "sometimes" is not a plan.
- Submit gas and electrical as separate permits if your city requires it. Many do, and bundling them incorrectly causes a rejection and a restart.
- Schedule rough-in inspection before you close up walls or set countertops. This is the single most common delay. Once stone is set, an inspector cannot see the gas line or the conduit.
- Final inspection after appliances and covers are installed. Have the manufacturer spec sheets on hand, inspectors frequently ask for clearance and ventilation documentation.
Safety Details Inspectors Actually Look For
- Clearance to combustibles. Every grill and side burner has a manufacturer-stated clearance to any combustible surface behind and beside it. This number is not negotiable and it drives your countertop depth and back-wall material.
- Ventilation in covered areas. A grill under a solid roof needs a hood or an engineered opening. A pergola with open slats usually qualifies as ventilated; a solid patio cover usually does not.
- Gas shutoff accessibility. The shutoff valve must be reachable without pulling the appliance. Plan the access panel into the island design, not after.
- GFCI protection. Every outdoor receptacle needs it, and inspectors check the reset location.
- Fire feature setbacks. Fire pits and fireplaces have their own clearance rules from structures, property lines, and overhead vegetation.
A Compliance Checklist You Can Hand to Your Designer
- HOA architectural approval submitted and approved
- City permit applications filed for gas, electrical, and any structure
- Manufacturer clearance specs pulled for every heat source
- Ventilation plan confirmed for any covered cooking area
- Gas and water shutoff access panels designed into the island
- GFCI locations marked on the electrical plan
- Fire feature setbacks verified against local code
- Rough-in inspection scheduled before finishes
- Final inspection scheduled before the first cook
If you are working with a designer or a trade partner, bring this list to the first planning meeting. BellaFina Outdoors supports design and visualization so you can lock the layout before permits are pulled, which is exactly when changes are still cheap.
Conclusion
The layouts that hold up are the ones planned around real use, real utilities, and real coastal conditions, not the ones that looked best in a catalog. That is where a design center earns its place in the process.
Frequently Asked Questions
What is the ideal layout for an outdoor kitchen?
An L-shaped layout works well for most backyards because it separates the cooking zone from the prep and seating areas while keeping everything within a few steps. For smaller spaces, a straight-line layout with a grill, sink, and refrigerator side by side can be efficient. The goal is to minimize walking between the grill, prep surface, and refrigerator, similar to the indoor kitchen work triangle.
What is the 'work triangle' rule for outdoor kitchen planning?
The work triangle connects the grill, prep sink, and refrigerator. Keeping each leg between 4 and 9 feet apart reduces steps and makes cooking smoother. In an outdoor kitchen, this often means placing the grill at the center of the layout with the sink and refrigerator on either side. Avoid placing the grill too close to seating to prevent smoke and heat from bothering guests.
Which materials are best for coastal outdoor kitchen environments?
Marine-grade stainless steel (316 grade) resists salt air corrosion better than 304 grade. For countertops, granite, quartzite, and porcelain tile hold up well to moisture and UV. Powder-coated steel cabinets and weather-resistant materials like HDPE or marine-grade polymer are good choices for cabinetry. Avoid unsealed porous stone and standard steel hardware, which can rust quickly near the coast.
What utility requirements should I consider before starting my outdoor kitchen project?
Plan for a dedicated gas line (natural gas or propane), at least one 20-amp electrical circuit for lighting and appliances, and a water line if you want a sink. Also consider drainage to prevent water pooling around the island, and ensure ventilation for any built-in grill.
How do I integrate fire features into my outdoor kitchen layout?
Place fire features at least 10 feet from the cooking zone to avoid heat interference and safety hazards. A fire pit or fire table can anchor a seating area adjacent to the kitchen, creating a natural gathering spot. Keep clear pathways between the grill and the fire feature. If you use a built-in fireplace, ensure it doesn't block the work triangle or ventilation.
What are the trends for outdoor kitchens in 2026?
In 2026, expect more smart appliances with Wi-Fi controls, modular kitchen islands that can be reconfigured, and sustainable materials like recycled composites. Ambient lighting integrated into countertops and pergolas is growing. Homeowners are also requesting multi-functional spaces that combine cooking, dining, and lounging, with weather-resistant finishes that handle coastal conditions.